Laikipia wildlife photography offers an unparalleled experience — a vast mosaic of private conservancies where the combination of extraordinary biodiversity, exclusive access, off-road freedom, and some of the most photogenic landscapes in East Africa creates conditions that are simply unmatched for capturing stunning safari images. Whether you are a seasoned professional arriving with a trunk full of prime lenses or a first-time safari visitor shooting on a smartphone, this guide will help you make the most of Laikipia’s extraordinary photographic opportunities.
What makes Laikipia particularly special for photography is the private conservancy model. Unlike national parks where you must stay on designated roads, many Laikipia conservancies allow off-road driving to position your vehicle for the perfect angle. Walking safaris bring you to eye level with your subjects. Night drives open up a world of nocturnal species that most safari photographers never see. And the sheer diversity of species — from the Big Five to rare endemics like the Grevy’s zebra and reticulated giraffe — means that every game drive offers fresh and compelling subjects.
Essential Camera Gear for Laikipia Wildlife Photography
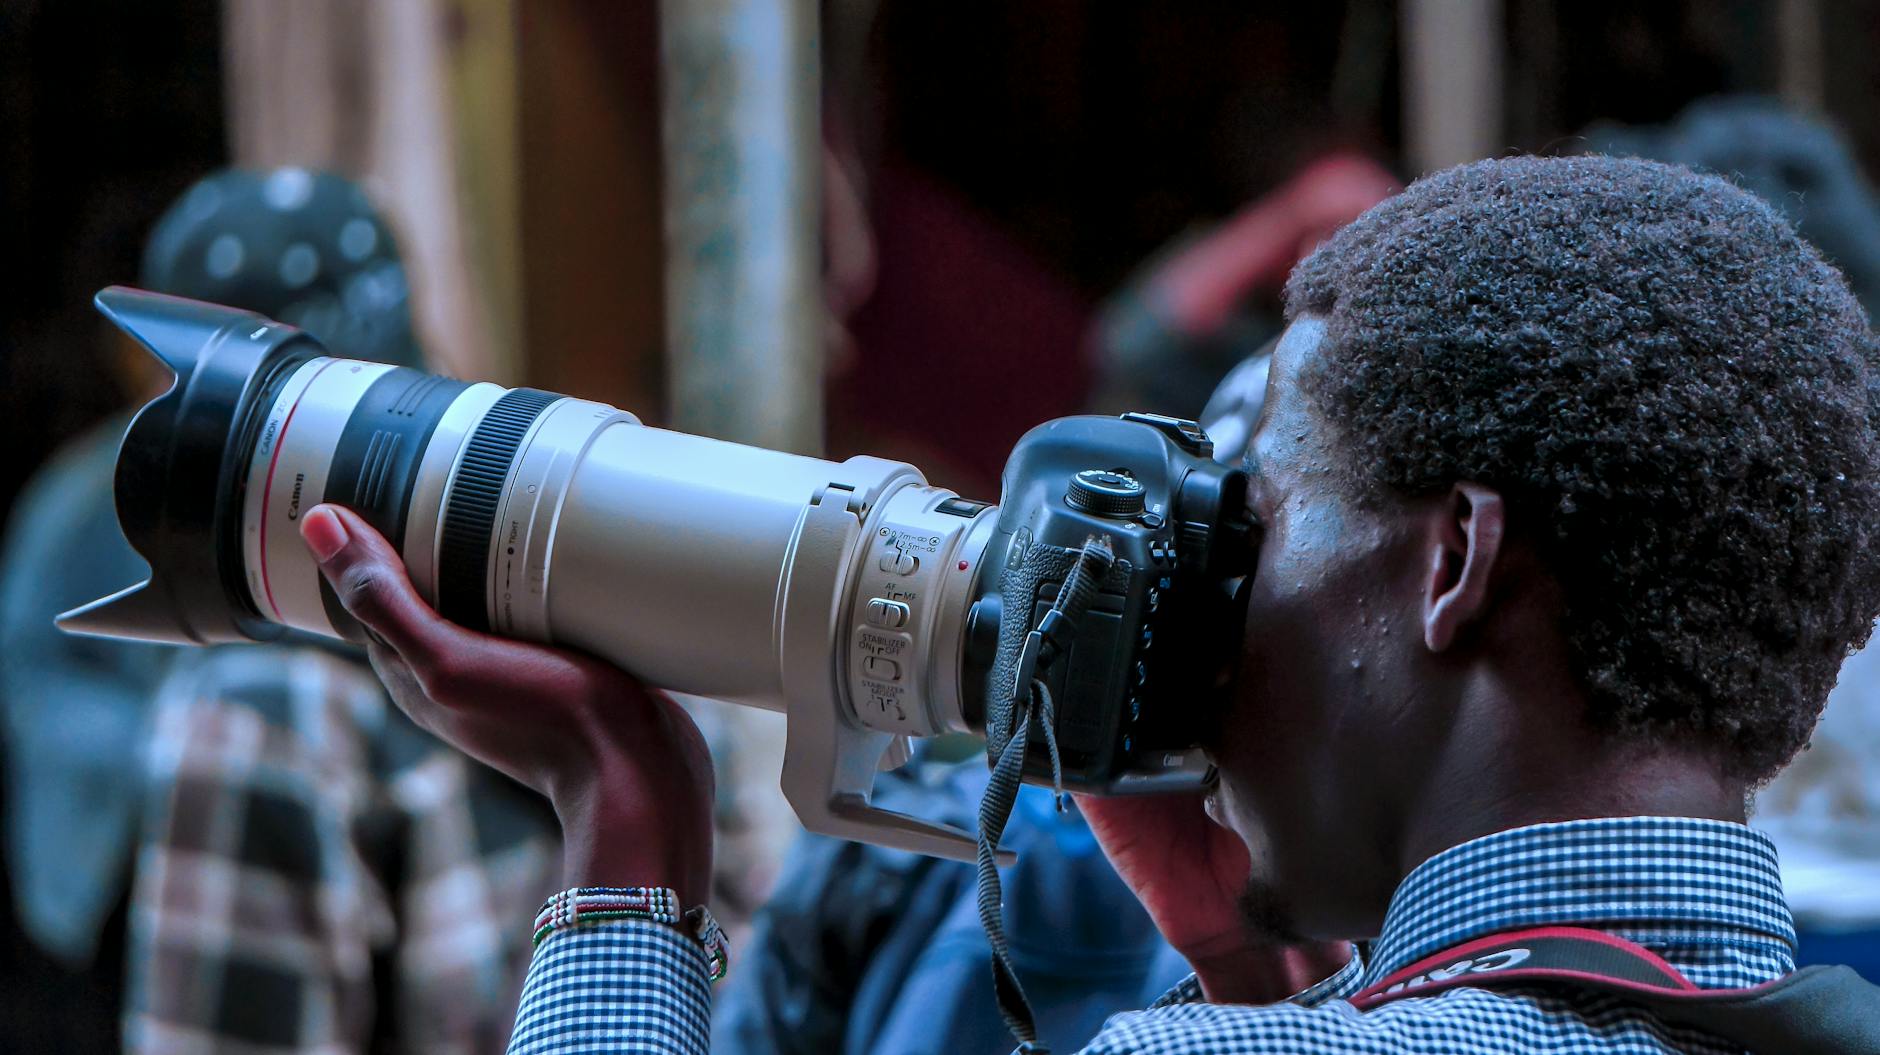
The right equipment makes an enormous difference to your Laikipia wildlife photography experience. Here is a practical gear guide covering everything from camera bodies and lenses to accessories and protection, with recommendations for every budget level.
Camera Bodies
Any modern interchangeable-lens camera — whether a DSLR or mirrorless system — will produce excellent safari images. The key features to prioritise for wildlife photography are fast and accurate autofocus (particularly continuous tracking focus for moving subjects), a high burst rate (at least 7 frames per second for action shots), good high-ISO performance (you will frequently be shooting in low light at dawn and dusk), and weather sealing (Laikipia’s dust is the biggest enemy of camera equipment).
For enthusiast photographers, cameras like the Canon R7, Nikon Z50, or Sony A6700 offer excellent wildlife performance in a lightweight, affordable package. For serious enthusiasts and professionals, the Canon R5 Mark II, Nikon Z8, or Sony A1 deliver top-tier autofocus and resolution. If you shoot Micro Four Thirds, the OM System OM-1 Mark II is exceptional for wildlife — its 2x crop factor turns a 150-400mm lens into an effective 300-800mm, giving you extraordinary reach in a compact package.
Lenses: The Most Important Investment
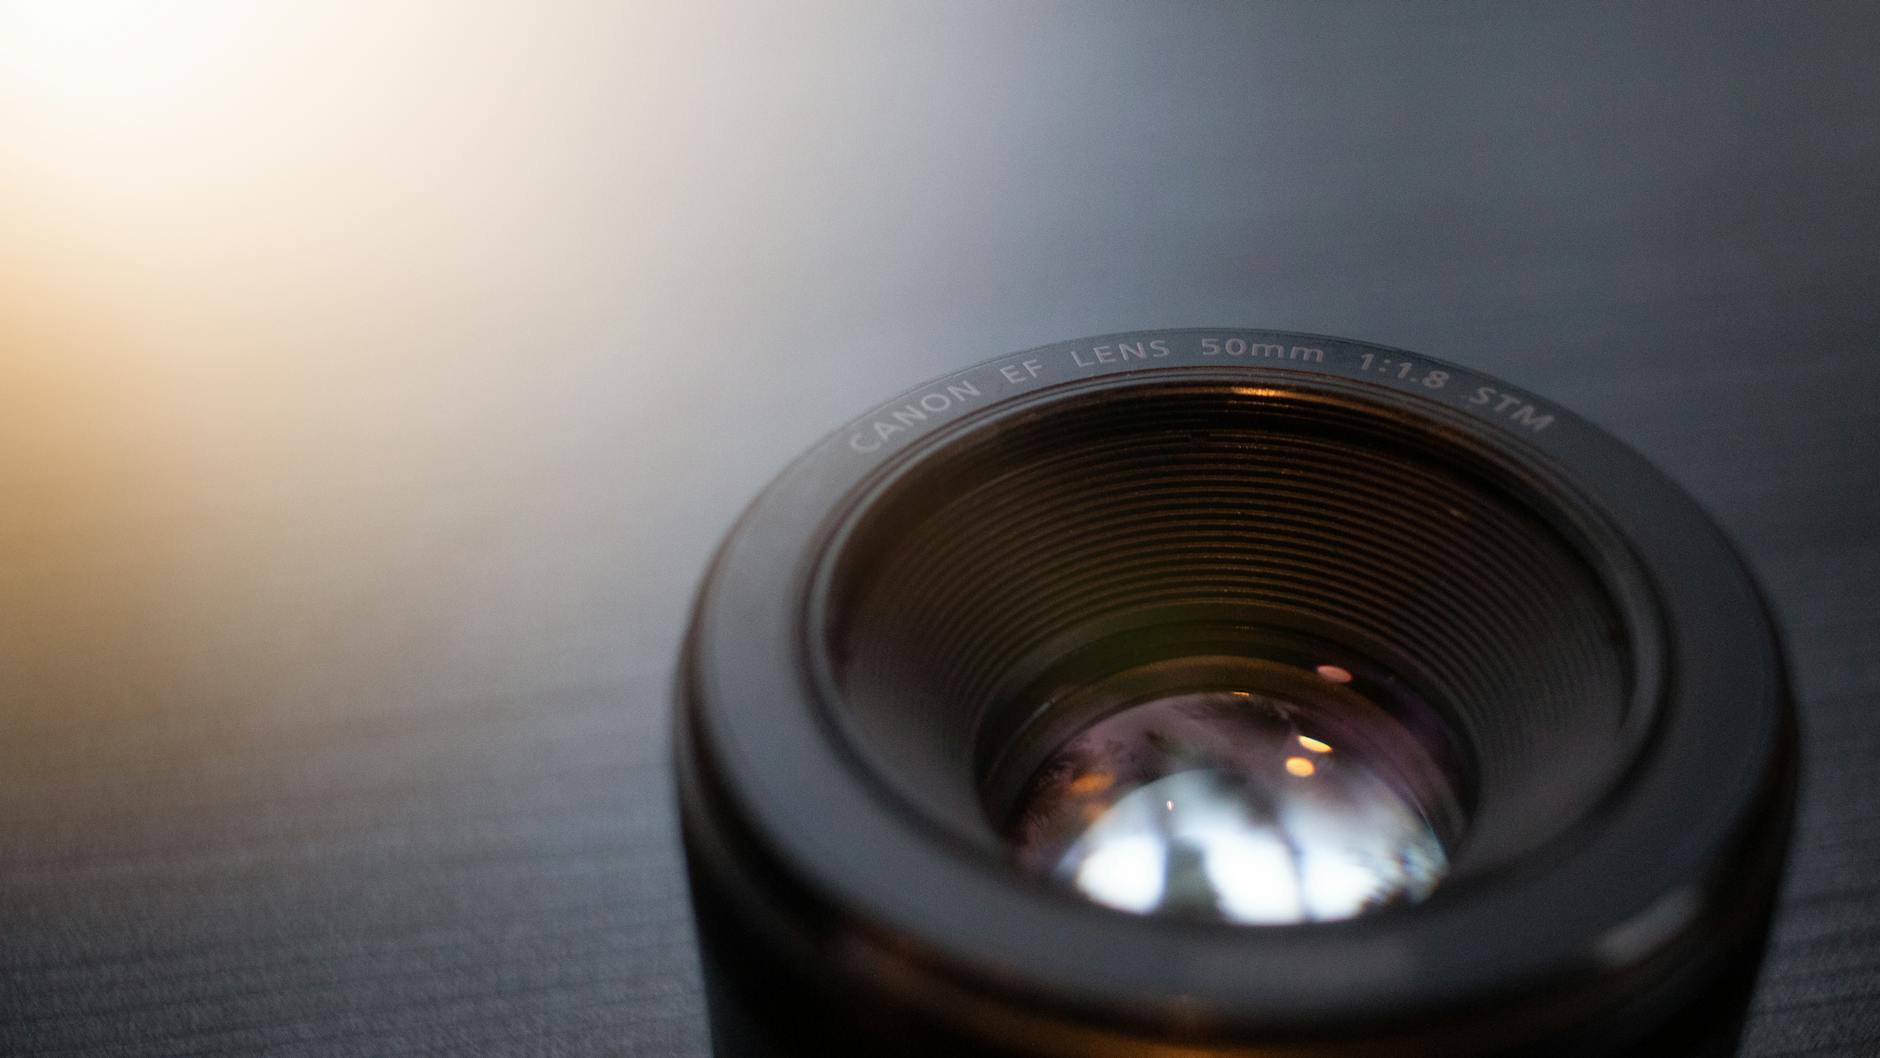
Your lens matters more than your camera body for wildlife photography. The single most important factor is focal length — you need reach to fill the frame with distant subjects. Here is what to bring at each budget level.
Essential (minimum recommendation): A 100-400mm or 70-300mm zoom lens. This range covers the vast majority of safari situations — animals at moderate distance, portraits with some background separation, and the flexibility to zoom out for wider environmental shots. The Canon RF 100-400mm f/5.6-8, Nikon Z 28-400mm, or Sony 70-300mm are excellent budget-friendly options starting around $500-800.
Ideal setup: A 100-400mm or 200-600mm telephoto zoom paired with a 24-70mm or 24-105mm standard zoom. The telephoto handles wildlife at distance, while the standard zoom captures landscapes, camp scenes, cultural portraits, and animals that are very close to the vehicle. The Sigma 150-600mm Contemporary and Sony 200-600mm are outstanding value picks offering superb reach at under $1,500.
Professional kit: A 600mm f/4 or 400mm f/2.8 prime lens for ultimate subject isolation and low-light performance, supplemented by a 70-200mm f/2.8 and a 24-70mm f/2.8. This is the setup that professional wildlife photographers use, but the weight and cost ($10,000+) put it beyond most travellers. If you are debating between investing in a better body or a better lens, always choose the lens — it will have a bigger impact on your images.
Accessories That Matter
Beyond cameras and lenses, several accessories will significantly improve your safari photography. A bean bag or window pod is essential — it rests on the vehicle door or window frame and provides a stable platform for your telephoto lens, dramatically reducing camera shake and improving sharpness. A bean bag costs under $30 and weighs nothing — it is the best value-for-money investment in your safari photography kit. Spare memory cards with fast write speeds (minimum UHS-II) are critical — shoot in RAW format and you will fill cards quickly. Bring at least double the capacity you think you need. Spare batteries should be charged nightly — cold mornings and intensive shooting drain batteries rapidly. Most Laikipia lodges offer charging facilities, though some remote camps run generators only at certain hours. A microfibre lens cloth and a rocket blower are essential for keeping dust off your lens and sensor. Laikipia’s red earth produces fine, pervasive dust that will coat your equipment within minutes of a dry-season game drive.
Mastering Safari Light

Light is the single most important factor in Laikipia wildlife photography, and understanding how to work with the equatorial light conditions here will transform your images from snapshots into art.
The Golden Hours
The golden hour — the period of soft, warm light immediately after sunrise and before sunset — is when the magic happens. In Laikipia, this period is compressed by the equatorial location: the sun rises and sets quickly, giving you approximately 20 to 30 minutes of truly golden light at each end of the day, compared to the hour or more that photographers in temperate latitudes enjoy. This means you need to be in position and ready to shoot the moment the light is right — there is no time to waste adjusting settings or finding your subject once the golden light arrives.
Sunrise in Laikipia occurs between 6:15 and 6:45 AM year-round, with the best golden light lasting until approximately 7:00 to 7:30 AM. Sunset falls between 6:15 and 6:45 PM, with the golden period beginning around 5:45 to 6:00 PM. Plan your game drives to be in productive wildlife areas during these windows — a good guide will position you accordingly.
Midday Light
The harsh overhead light between 10:00 AM and 3:00 PM is challenging for traditional wildlife portraiture, producing strong shadows, washed-out highlights, and flat-looking images. However, it is not wasted time. Midday light is excellent for high-contrast black-and-white images, for photographing subjects in shade (where the light is diffused and even), and for creative techniques like silhouettes, backlit dust clouds, and high-key compositions. Some of the most striking images from African safaris are shot in midday conditions by photographers who know how to use the harsh light creatively rather than fighting against it.
Overcast and Stormy Conditions
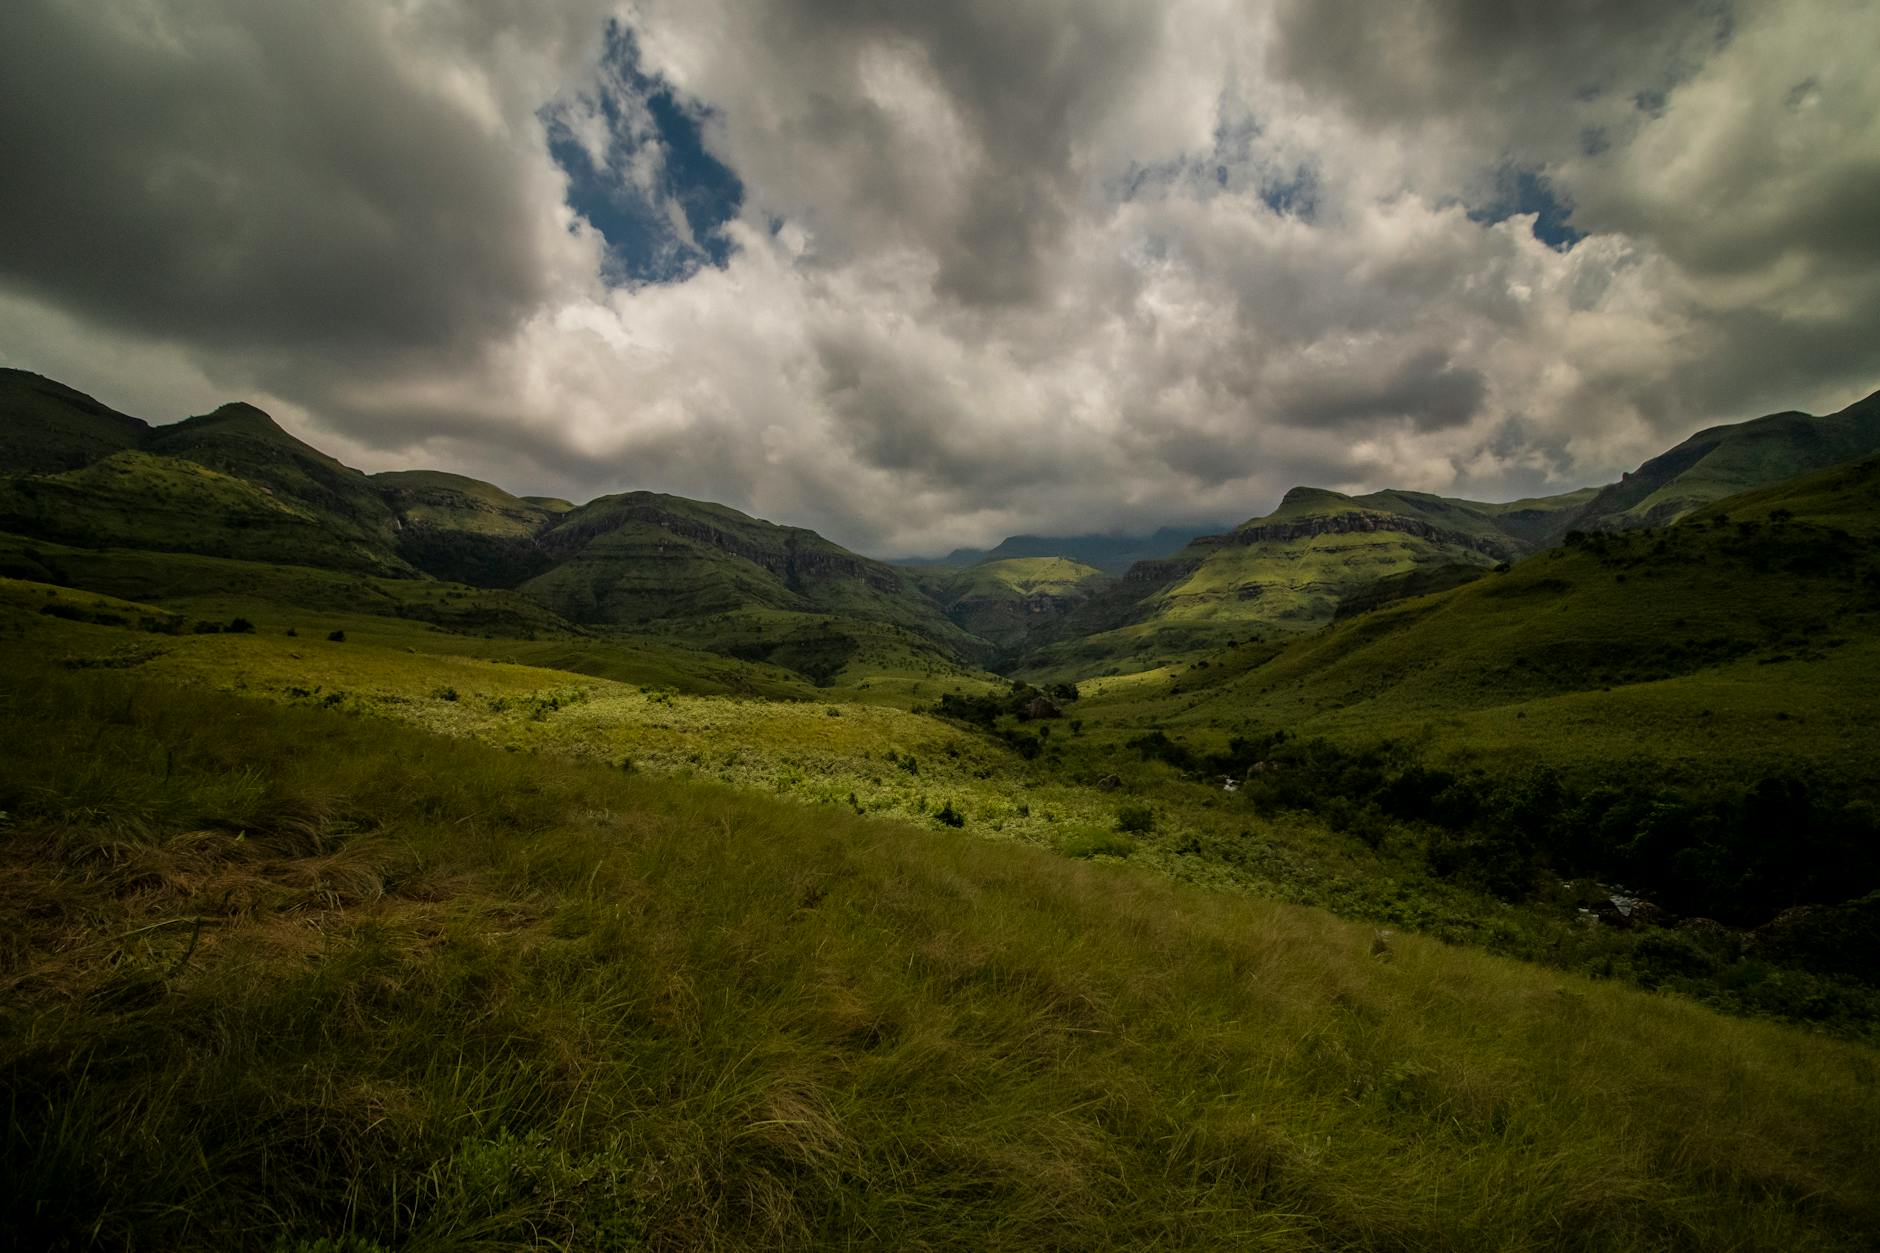
During the green season, overcast skies and approaching storms create some of the most dramatic photographic conditions. The diffused light of an overcast day is actually ideal for wildlife portraiture — it eliminates harsh shadows, produces even illumination across your subject, and brings out subtle colour variations in fur, feathers, and skin. Storm clouds building on the horizon provide spectacular backdrops for landscape shots and silhouettes. The key is to embrace these conditions rather than retreating to the lodge — some of the most memorable safari images are captured in weather that less committed photographers would consider too poor to shoot in.
Camera Settings for Safari Photography
Having the right settings dialled into your camera before you encounter your subject is critical for Laikipia wildlife photography, where opportunities can appear and disappear in seconds. Here are the settings that professional safari photographers use as their starting point.
Aperture Priority Mode
Aperture priority (A or Av mode) is the workhorse mode for safari photography. Set your aperture to the widest available on your lens (f/4, f/5.6, or f/6.3 depending on your glass) for portraits and individual subjects, which will blur the background and isolate your subject. For group shots, landscapes with wildlife, or when you need more depth of field, stop down to f/8 or f/11. Let the camera handle the shutter speed automatically, but keep an eye on the minimum — if it drops below the safe handheld threshold for your focal length (typically 1/focal length as a rule of thumb), increase your ISO.
Shutter Speed Guidelines
For static animals — a resting lion, a perched bird, a feeding elephant — a shutter speed of 1/500th to 1/800th of a second is generally sufficient when shooting from a stable platform (bean bag on the vehicle). For walking animals, aim for 1/1000th to 1/1600th. For fast action — running predators, flying birds, fighting animals — you need 1/2000th or faster. For panning shots that convey motion with a blurred background, slow your shutter speed to 1/60th to 1/250th and track your subject smoothly through the frame.
ISO Strategy
Modern cameras produce excellent results at high ISO values, so do not be afraid to push your ISO to get the shutter speed you need. At dawn and dusk, ISO 1600 to 6400 is perfectly normal, and cameras like the Canon R5 or Sony A1 produce clean, usable images at ISO 12800 and beyond. Noise in a sharp image is always preferable to a clean image that is blurred from camera shake or subject motion. Set your ISO to Auto with a maximum of ISO 6400 or ISO 12800 (depending on your camera’s capability) and let the camera adjust as light conditions change.
Autofocus Settings
Set your camera to continuous autofocus (AI Servo on Canon, AF-C on Nikon and Sony) so that it tracks your subject as it moves. Use the widest autofocus area that still reliably locks onto your subject — most modern cameras have animal eye detection that is remarkably effective and should be enabled for wildlife shooting. Back-button focus (assigning autofocus to a rear button rather than the shutter release) is strongly recommended, as it allows you to lock focus independently of the shutter, giving you more precise control over when and where the camera focuses.
Photographing Laikipia’s Key Species
Each species presents unique photographic challenges and opportunities. Here is how to approach the most sought-after subjects for Laikipia wildlife photography.
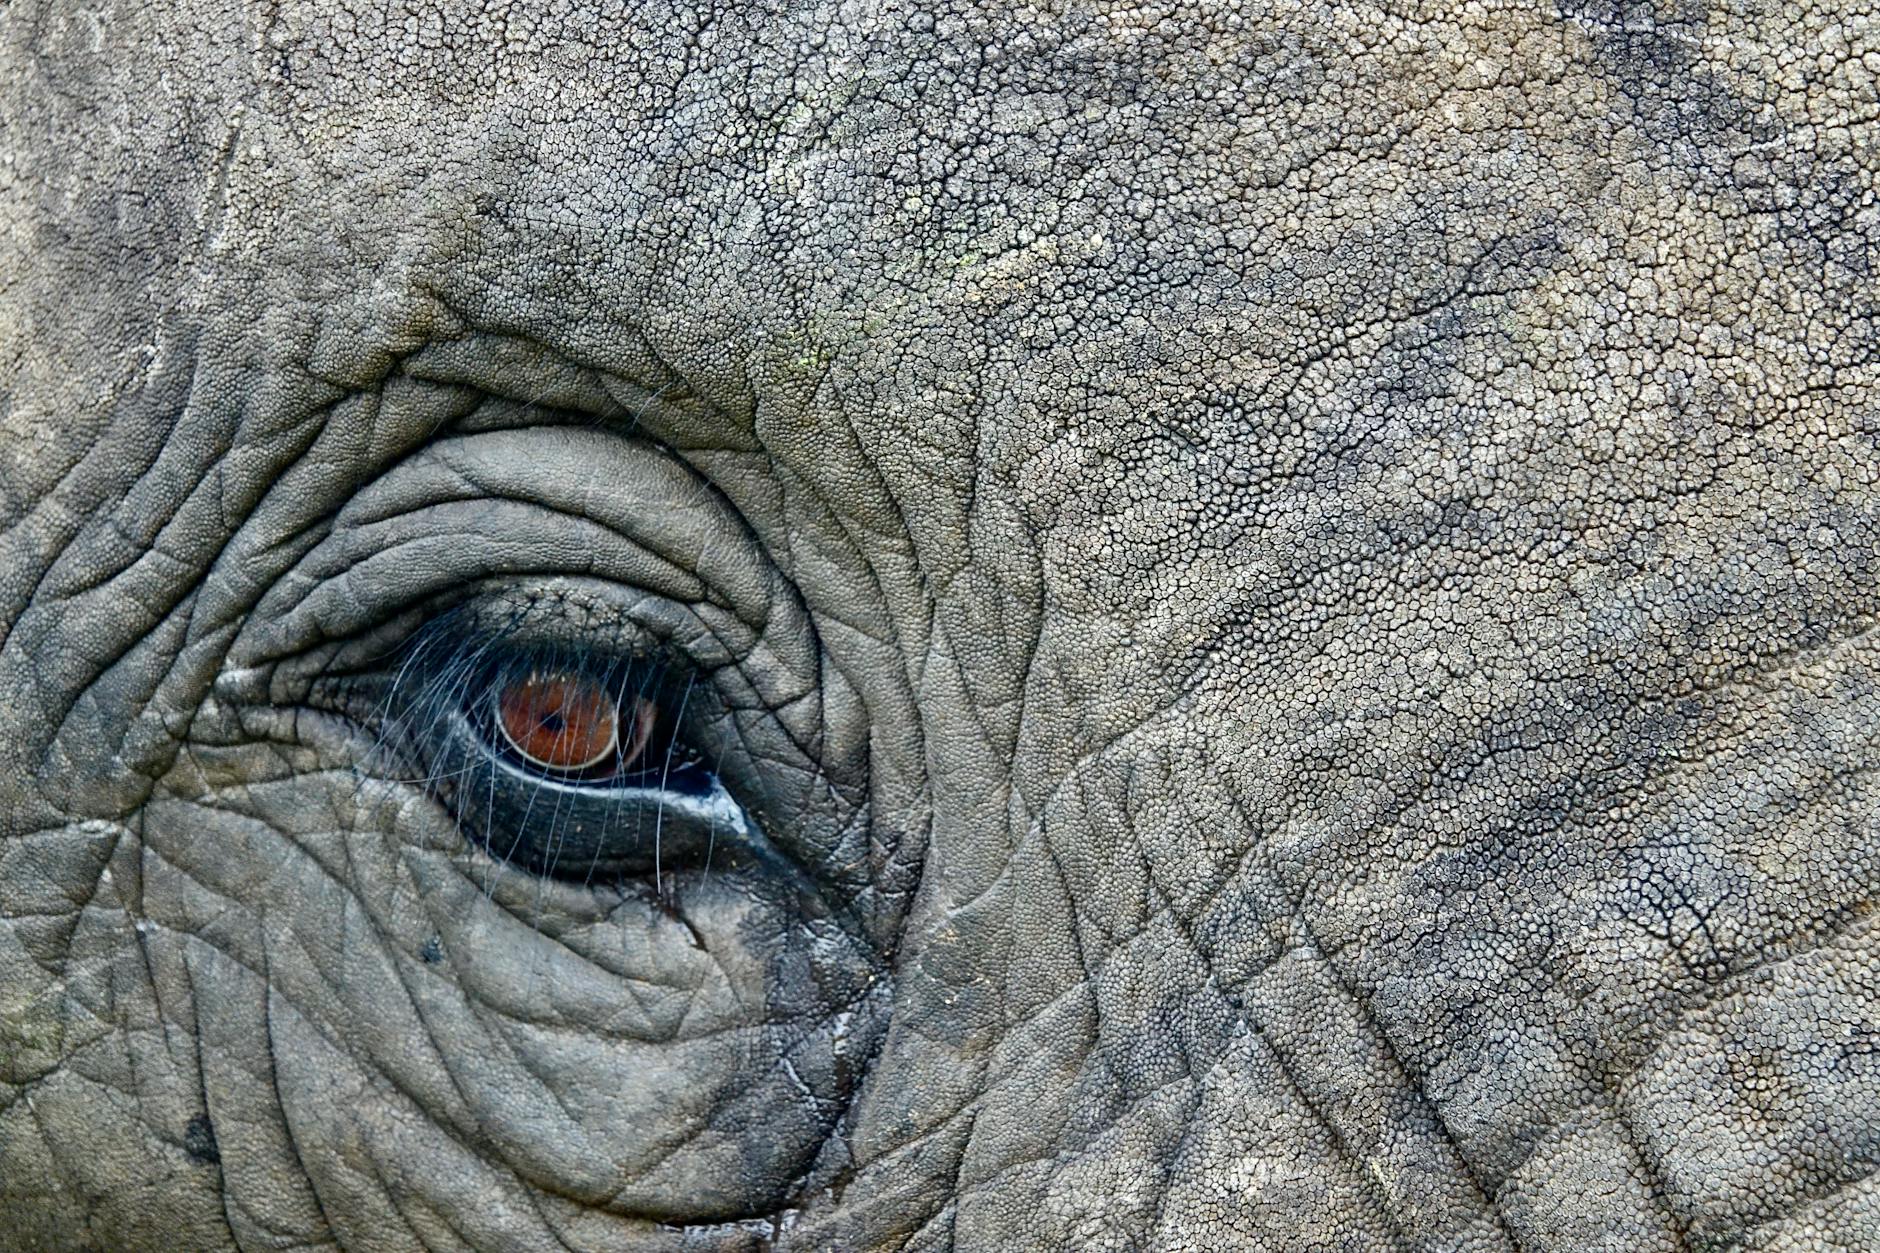
Elephants
Laikipia’s elephants are among the most photogenic in Africa — large, confident, and accustomed to vehicles. For portraits, shoot at eye level (which is easy from a safari vehicle) and focus on the eyes. Elephants’ deeply wrinkled skin, expressive ears, and graceful trunk movements create endlessly varied compositions. For environmental portraits that convey their scale, include landscape elements — Mount Kenya in the background, a line of trees, or a vast sky. The most dramatic elephant images are captured during dust baths, when elephants throw red earth over their bodies in explosive clouds that catch the light beautifully, and at waterholes, where drinking, bathing, and social interactions provide continuous action. Use a focal length of 200-400mm for portraits and 24-100mm for wider environmental shots.
Rhinos
Laikipia offers some of the best rhino photography in Africa, particularly at Ol Pejeta and Lewa conservancies. Black rhinos are more solitary and often photographed in dramatic isolation against the landscape. Their massive horns and armoured-looking skin create powerful, prehistoric-feeling images. Side-on profiles with strong sidelighting at dawn or dusk emphasise the horn and body contour. White rhinos are often in groups and can be photographed in social interactions. For both species, a 400-600mm lens is ideal, as rangers maintain a safe distance. The guided rhino tracking experiences at Ol Pejeta bring you within 30 metres on foot — an extraordinary photographic opportunity, though you should follow your guide’s instructions carefully and avoid sudden movements that might startle the animals.
Leopards and the Black Leopard
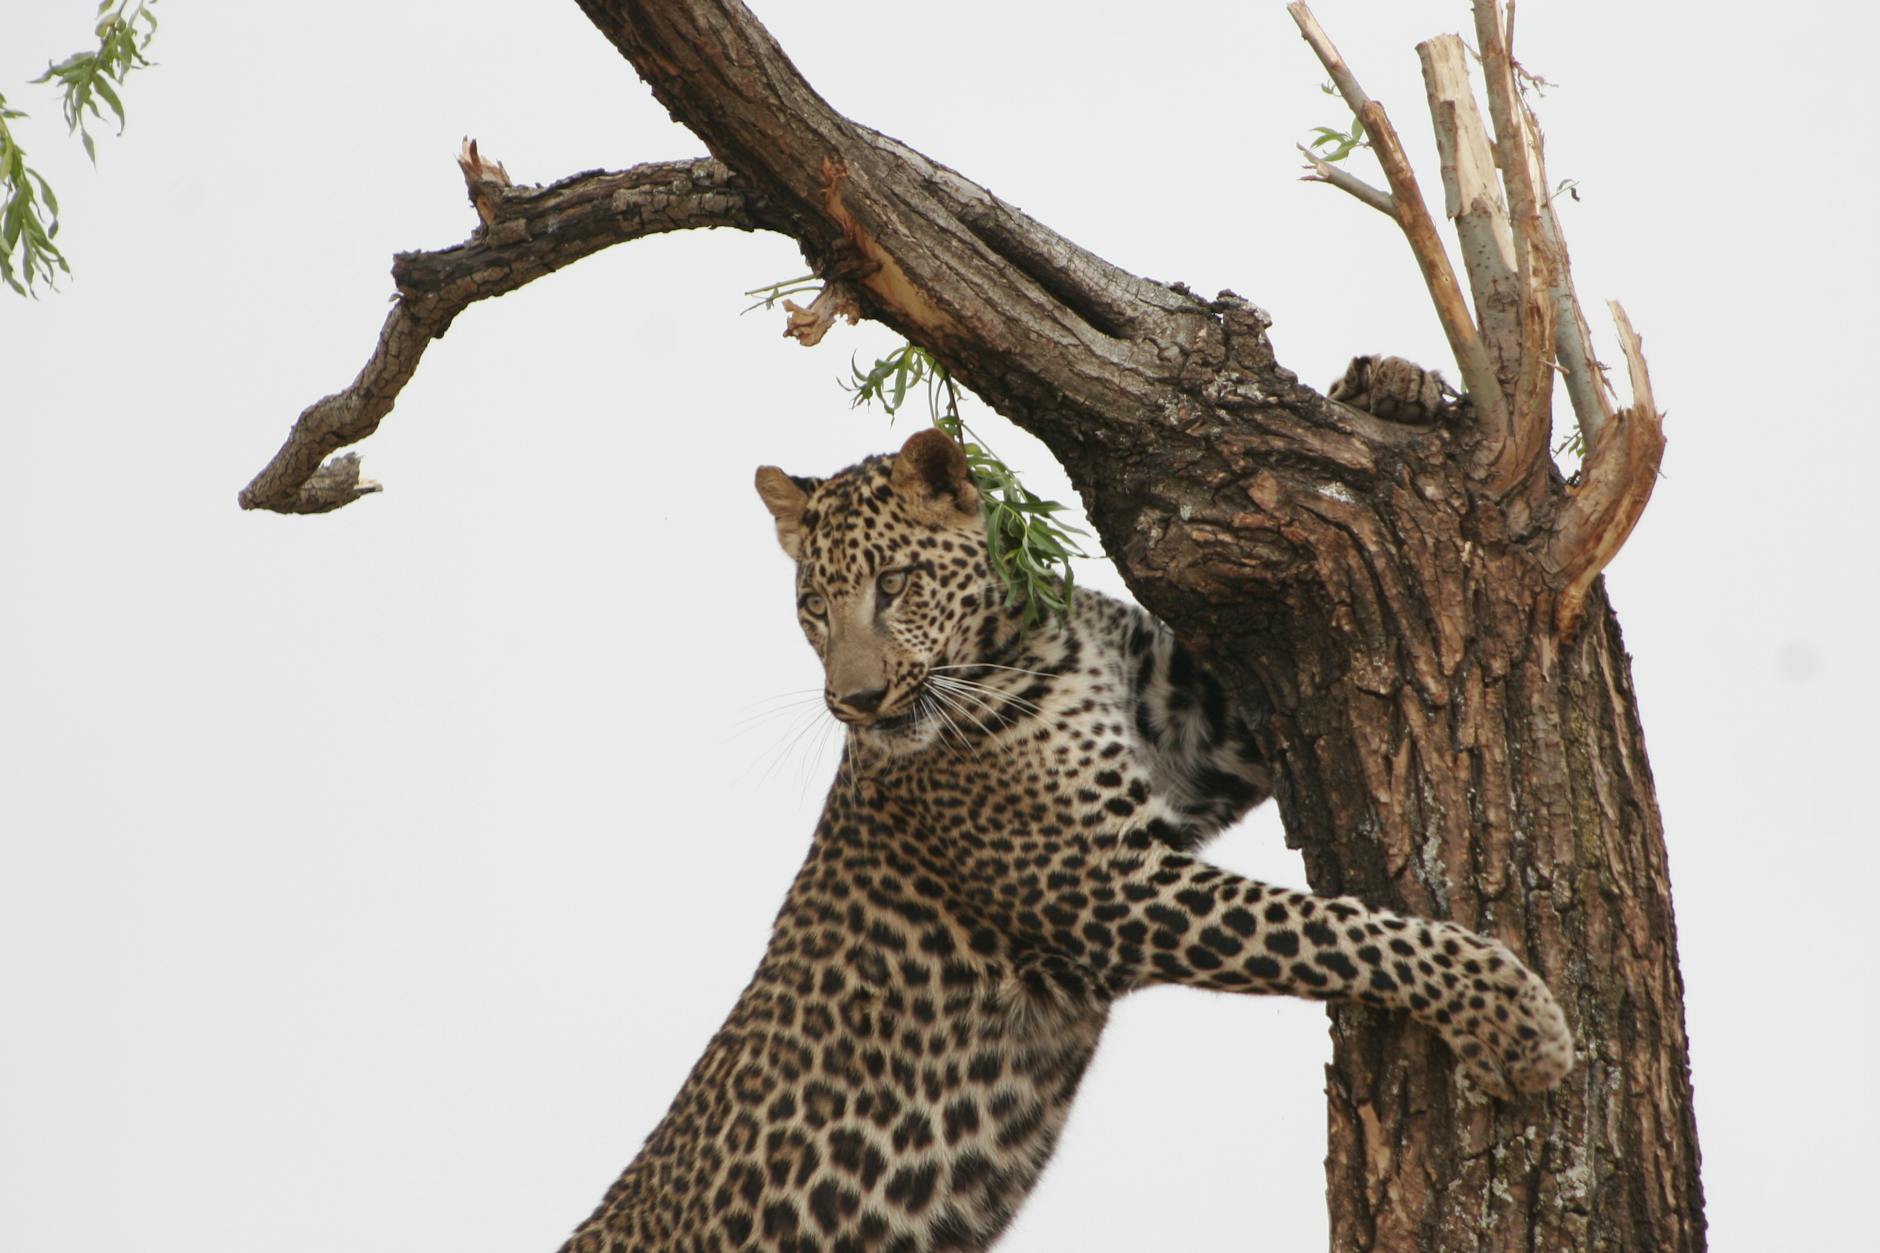
Leopards are among the most challenging and rewarding safari subjects. They are masters of camouflage, often visible as nothing more than a draped tail hanging from a tree branch until you learn to spot them. When you do find a leopard, patience is the key — they are crepuscular hunters, meaning their most photogenic moments come in the low light of dawn and dusk, demanding high ISO values and fast lenses. A leopard in a tree, backlit by golden sunrise light, is one of the classic safari images, and Laikipia delivers this shot more reliably than almost anywhere else in Kenya.
Laikipia is also home to Africa’s largest known population of melanistic (black) leopards, concentrated around the Laikipia Wilderness area. The famous individual known as Giza has been photographed and filmed more than almost any other melanistic leopard, yet sightings remain rare and unpredictable. Photographing a black leopard requires specialised camera trap setups or exceptional luck during night drives — the animals’ dark coats absorb light, making them virtually invisible in low-light conditions. If you are fortunate enough to encounter one, use a high ISO, fast shutter speed, and avoid flash, which can disturb the animal.
Lions
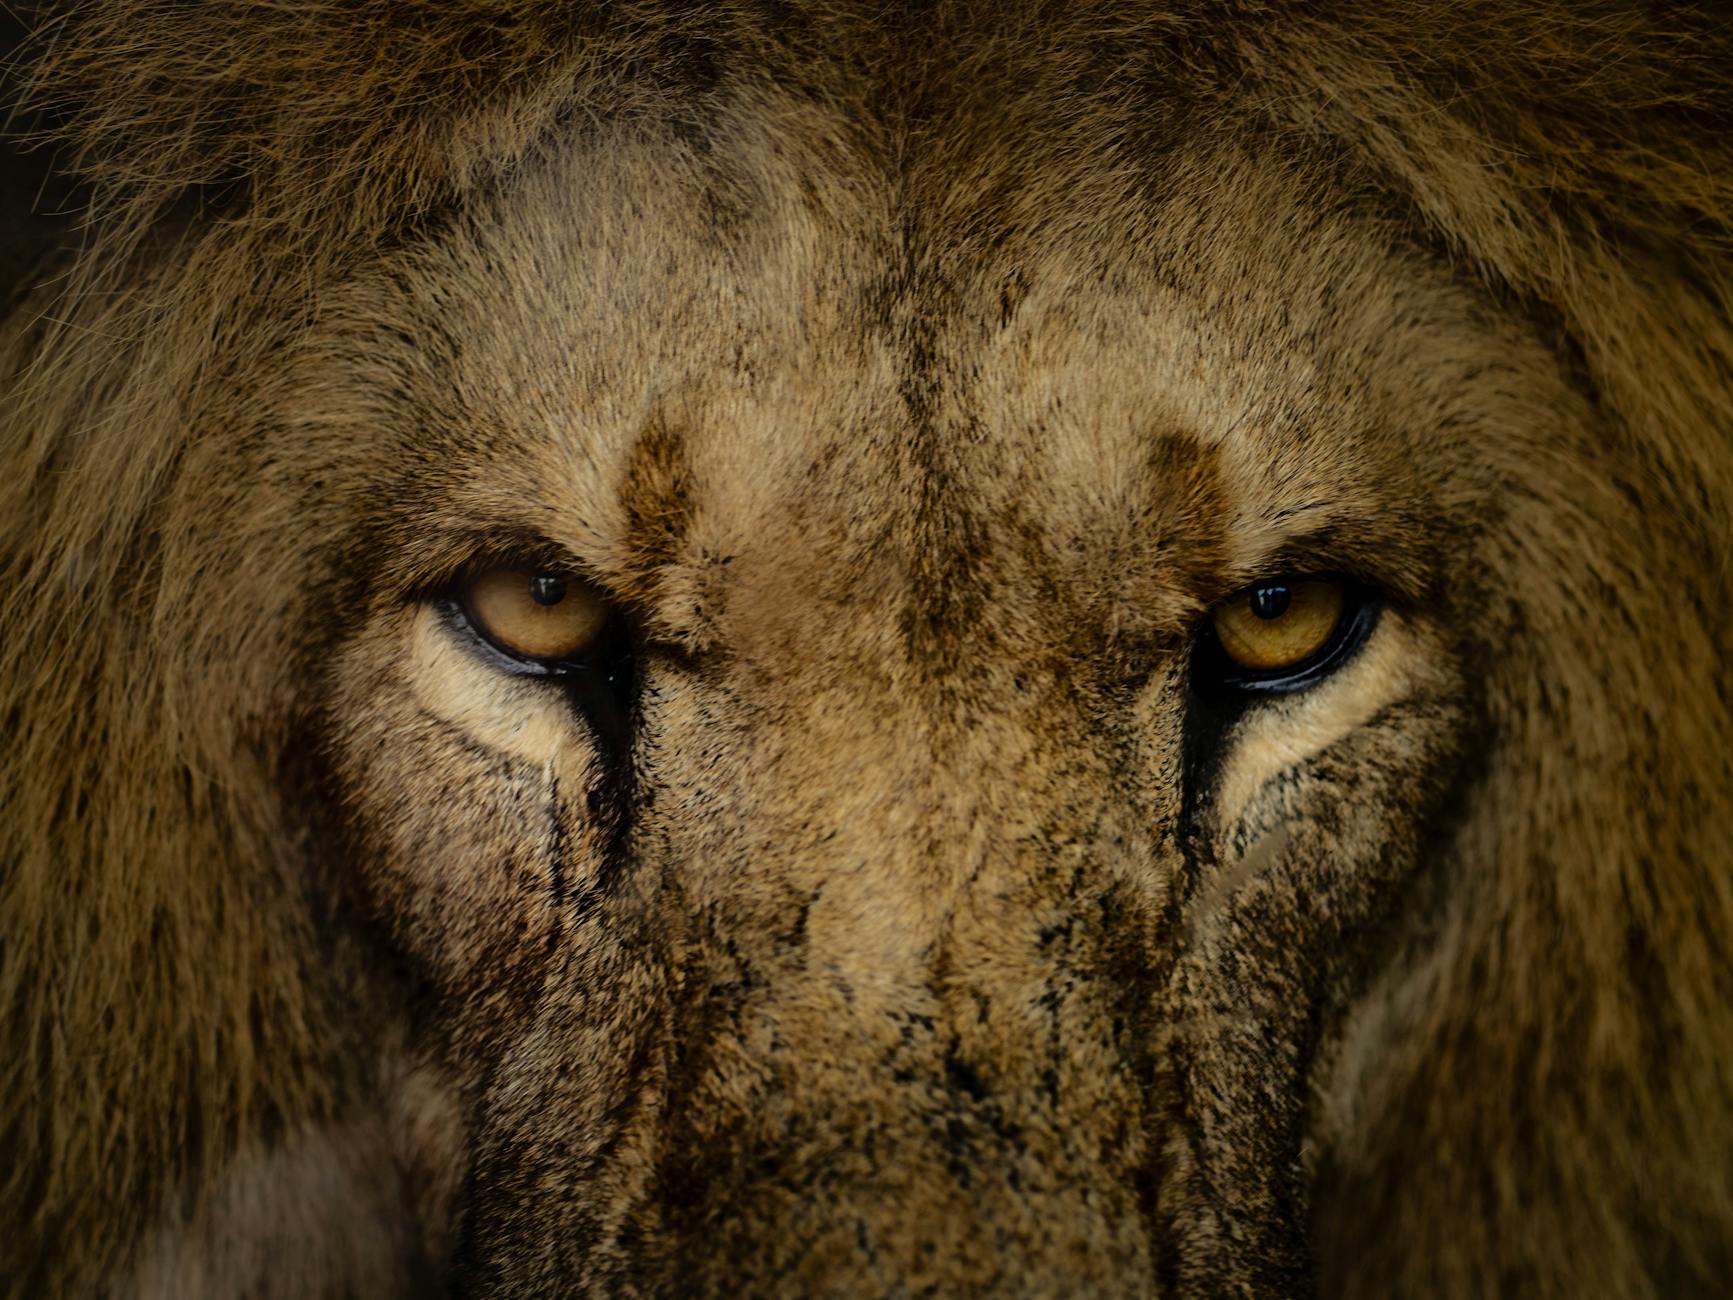
Lions are the most obliging of Laikipia’s big cats for photographers — they spend much of the day resting, giving you extended opportunities to compose your shots carefully. The classic lion portrait requires a 300-600mm lens, eye-level shooting position, wide aperture for background blur, and focus locked onto the nearest eye. For environmental shots, include the landscape to convey the vastness of the lions’ territory. The most dramatic lion images come during active moments — the intense stare of a stalking lioness, a pride moving in formation at dawn, cubs playing in golden light, or the raw power of a feeding scene. Night drives offer unique opportunities for images of lions on the hunt, though the artificial lighting requires careful handling to avoid flat, flashlit results.
Grevy’s Zebra and Reticulated Giraffe
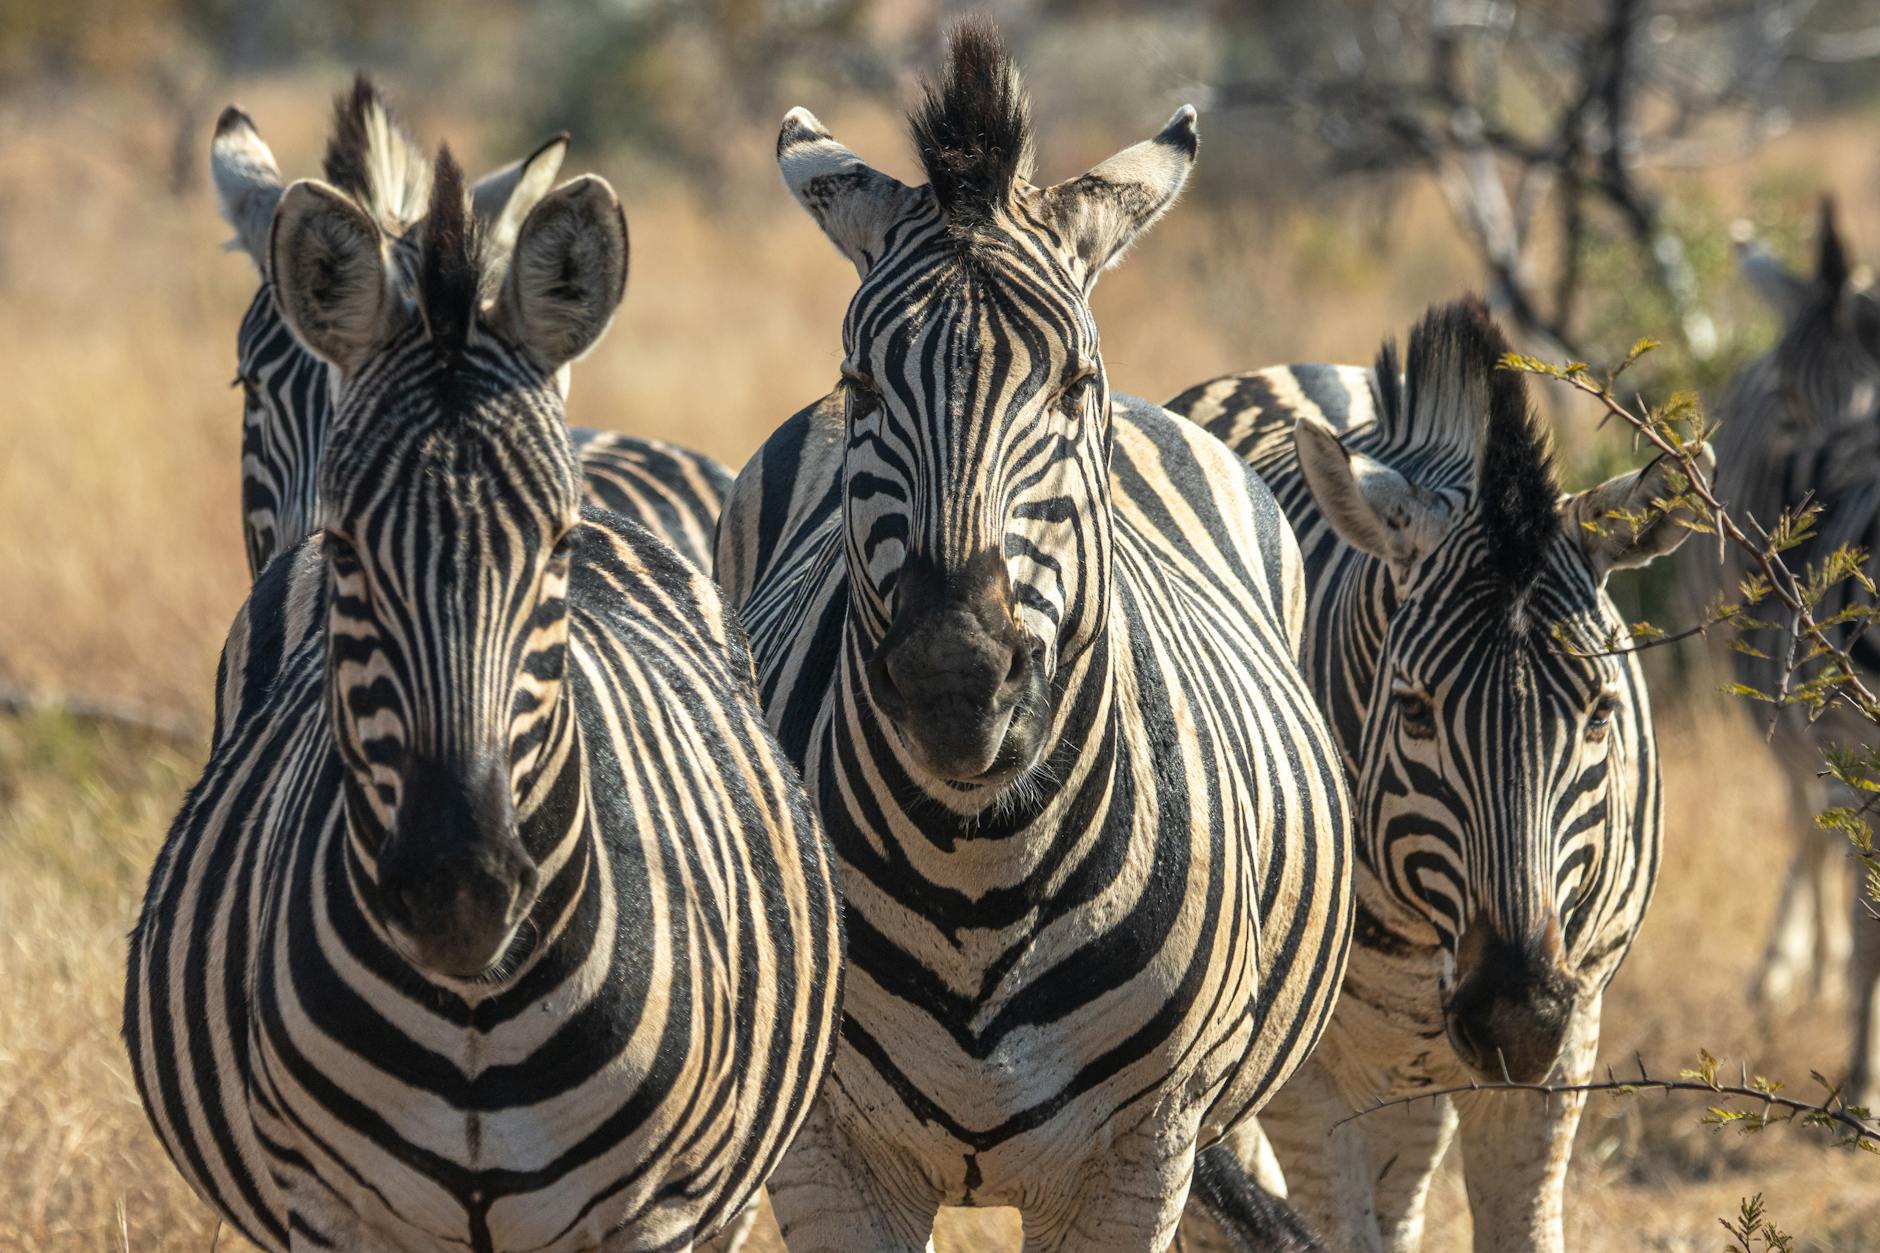
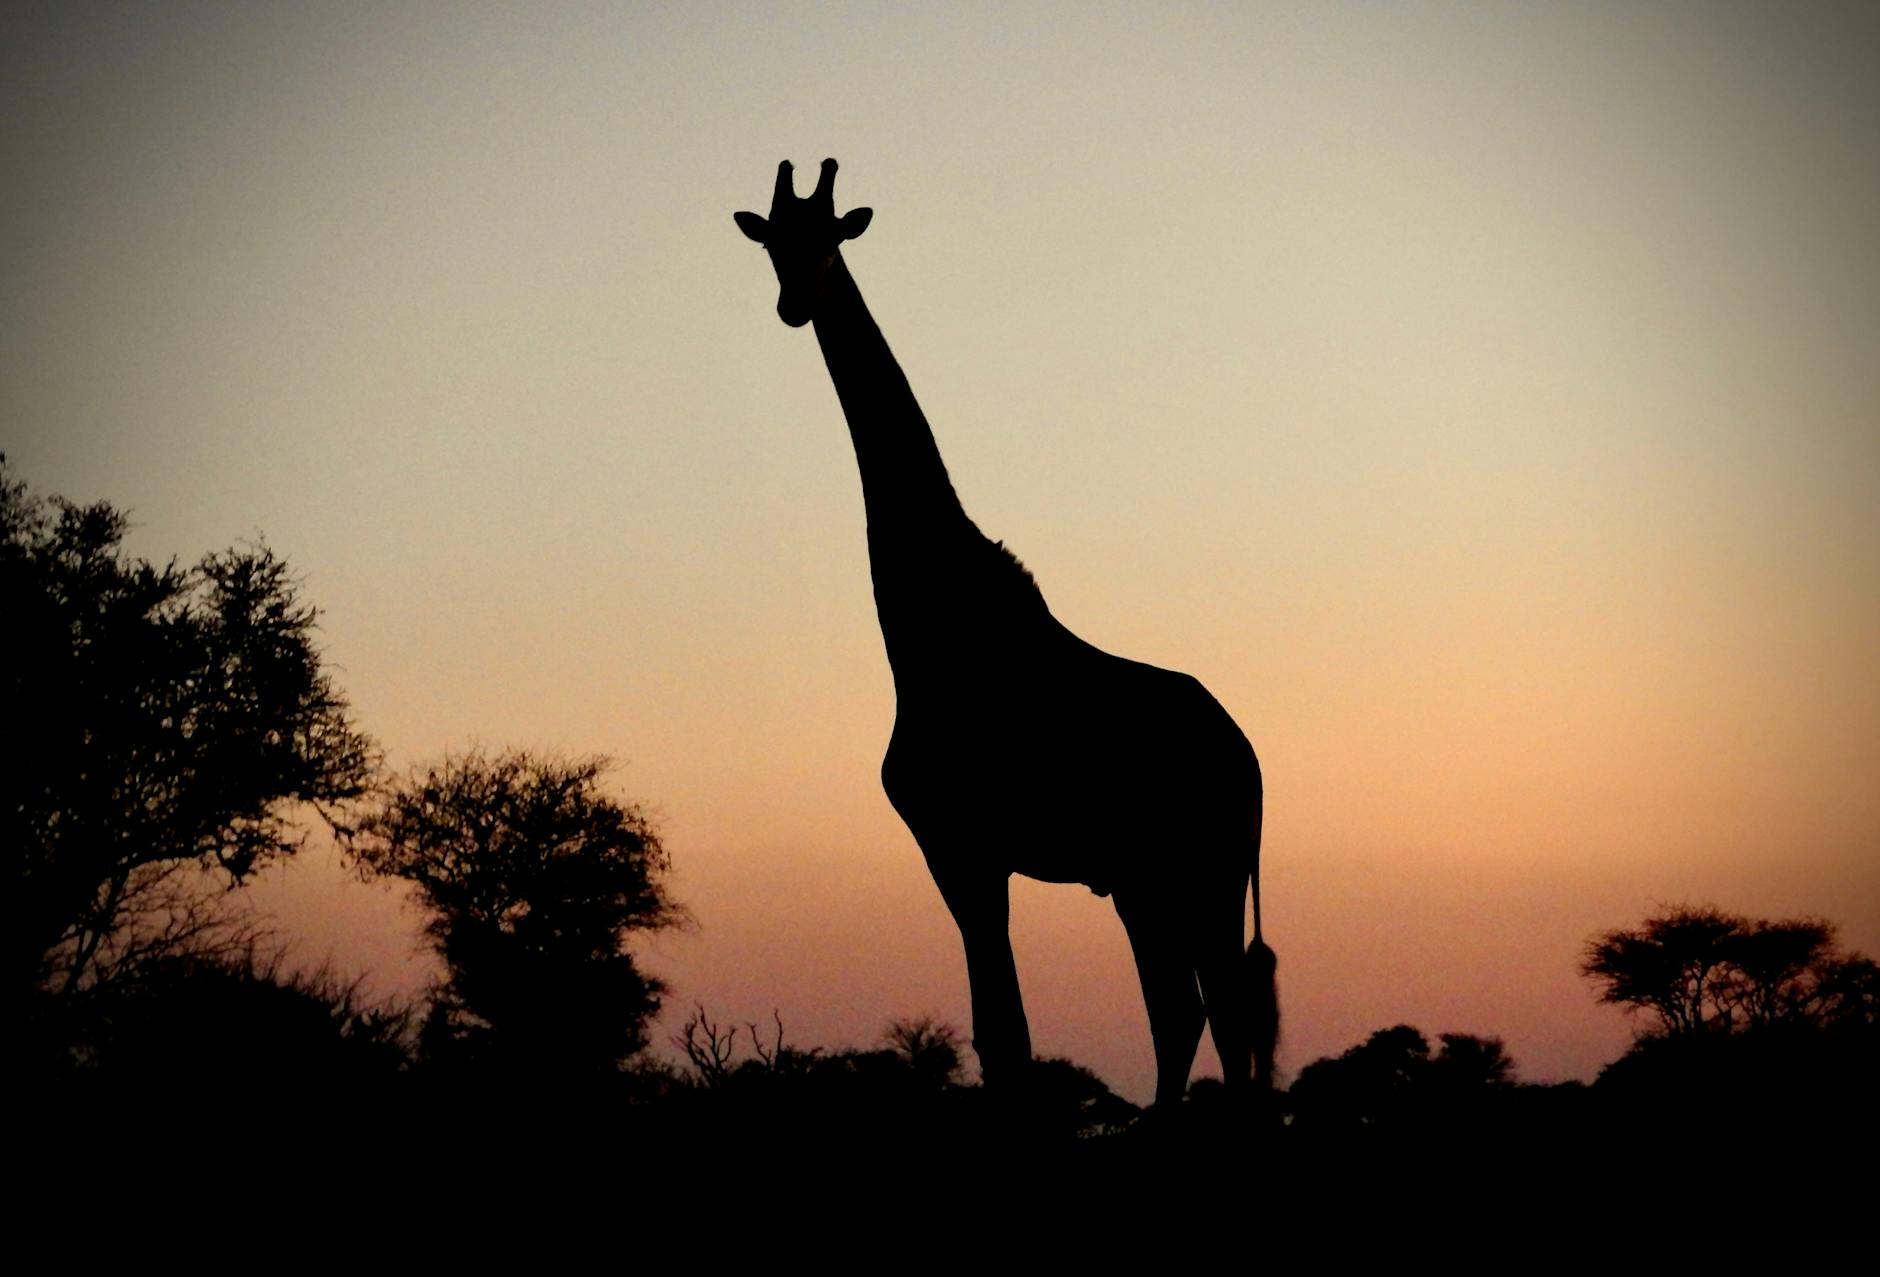
Laikipia’s signature species are also among its most photogenic. Grevy’s zebras have narrower, more intricate stripe patterns than the common plains zebra, creating graphic, almost abstract compositions when photographed up close. A tight crop on the stripes of a Grevy’s zebra — filling the entire frame with black and white patterns — is a striking image that works beautifully as a print. Reticulated giraffes, with their bold geometric patterns and graceful movements, are equally compelling. Silhouette shots of giraffes against sunset skies are Laikipia classics, and the animal’s towering height allows you to compose images with dramatic perspective and negative space.
African Wild Dogs
Wild dogs are among the most exciting subjects for action photography. They move fast, hunt cooperatively, and their painted coats and enormous rounded ears make them visually distinctive. The challenge is keeping up with them — wild dog hunts can cover several kilometres at speeds of 60 kilometres per hour, testing both your driver’s skill and your ability to track focus on a moving target. Use continuous autofocus, a high burst rate, and a shutter speed of at least 1/2000th for running subjects. The quieter moments — pack interactions, puppy play, and communal greetings — are equally photogenic and far easier to capture.
Birds
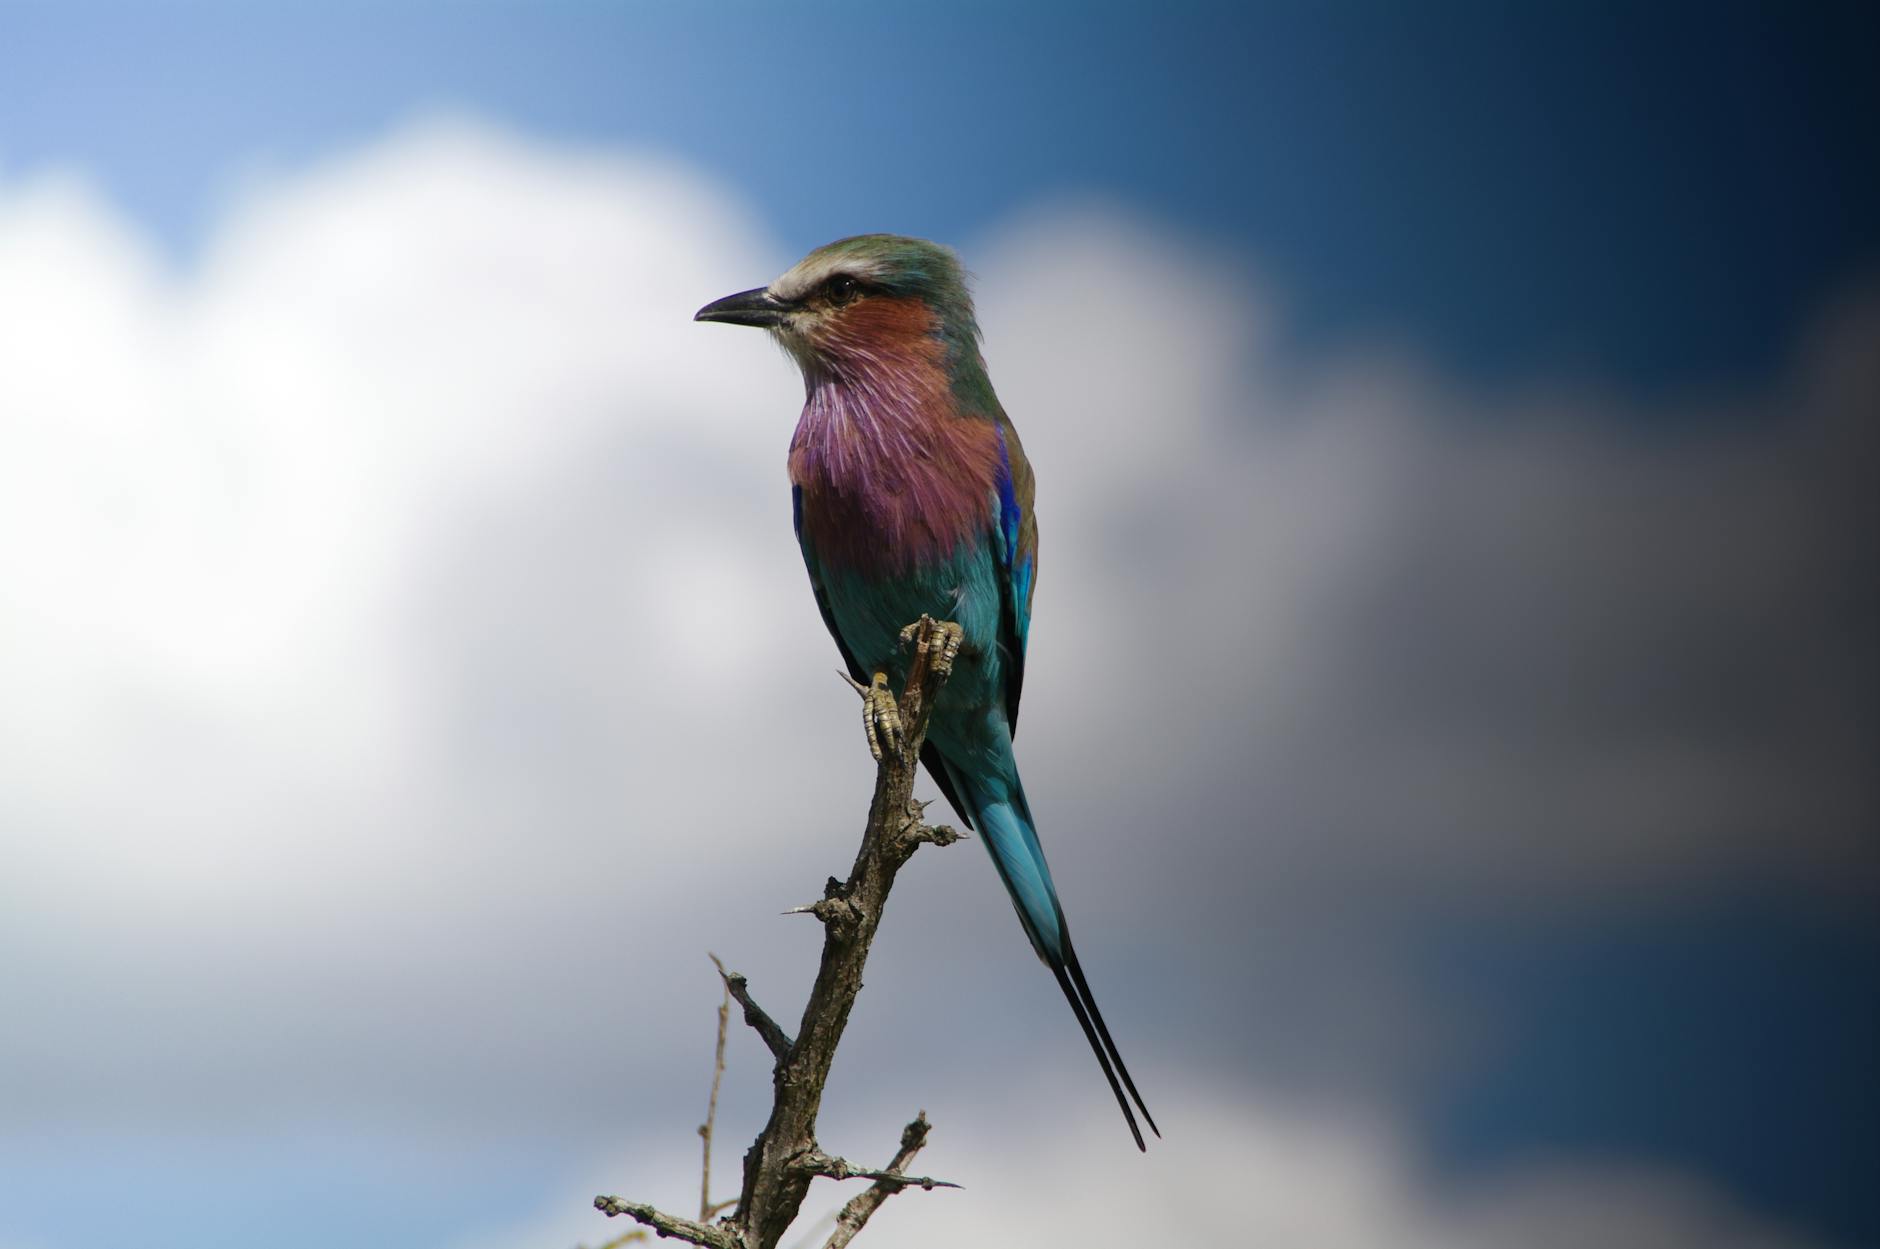
With over 540 recorded species, Laikipia is a bird photographer’s dream. The challenges are different from mammal photography — birds are smaller, faster, and often perch in cluttered environments. A 600mm lens (or equivalent with a crop-sensor camera) is ideal for frame-filling portraits of perched birds. For birds in flight, a 200-400mm zoom gives you the field of view to track subjects against the sky. Laikipia’s star bird subjects include the striking lilac-breasted roller (a perch-and-hunt species that is relatively easy to photograph), the massive Kori bustard (Africa’s heaviest flying bird), martial eagles and other raptors that soar on Laikipia’s thermals, and colourful sunbirds, bee-eaters, and starlings that catch the light spectacularly.
Creative Laikipia Wildlife Photography Techniques
Beyond standard wildlife portraiture, Laikipia wildlife photography benefits from the region’s diverse landscapes and unique access opportunities, lending themselves to a range of creative techniques that will set your images apart.
Silhouettes
Laikipia’s dramatic sunrises and sunsets provide perfect conditions for silhouette Laikipia wildlife photography. Position your subject between yourself and the sun, expose for the bright sky (which will render the subject as a dark shape), and look for subjects with strong, recognisable outlines — giraffes, acacia trees, elephants, and walking figures all produce powerful silhouettes. The key is to arrive at your shooting position at least 15 minutes before the sun reaches the horizon, so you have time to compose and wait for wildlife to move into position.
Landscape and Environmental Photography
Do not spend your entire safari looking through a telephoto lens. Some of the most evocative images from Laikipia capture the vastness of the landscape — the sweeping grasslands, the snow-capped peak of Mount Kenya rising above the plateau, the dramatic storm clouds of the green season, and the intimate details of camp life. A wide-angle lens (16-35mm or 24-70mm) is essential for these shots. Look for foreground interest — a termite mound, a patch of wildflowers, a game trail leading into the distance — to give your landscapes depth and scale. Include wildlife as a small element within a vast landscape to convey the sense of space and wildness that defines Laikipia.
Black-and-White Conversion
Laikipia’s wildlife lends itself beautifully to black-and-white Laikipia wildlife photography. The textures of elephant skin, the patterns of zebra stripes, the drama of storm clouds, and the contrast of light and shadow in the bush all translate powerfully into monochrome. Shoot in colour (preferably RAW) and convert to black and white during post-processing — this gives you maximum control over tonal range and contrast. High-contrast midday light, which is difficult for colour photography, often works superbly for black and white, making it a productive technique during the hours when golden-hour shooters are resting at the lodge.
Night Photography and Camera Traps
Night drives offer unique Laikipia wildlife photography opportunities for nocturnal species — aardvarks, bush babies, genets, porcupines, and hunting predators. The challenge is working with artificial spotlight illumination, which can produce flat, red-eyed images if used carelessly. Use a high ISO (3200-12800), wide aperture, and avoid on-camera flash, which produces harsh, unnatural results. If your guide uses a filtered red or amber spotlight, the resulting warm-toned images can be atmospheric and distinctive. For the ultimate in nocturnal wildlife photography, some Laikipia properties can arrange camera trap setups at waterholes or along game trails — remotely triggered cameras that capture animals in their natural behaviour without human presence.
Smartphone Safari Photography
You do not need a professional camera for memorable Laikipia wildlife photography. Modern smartphones — particularly the latest iPhone Pro, Samsung Galaxy Ultra, and Google Pixel Pro models — have transformed what is possible with a pocket-sized device. Their computational photography engines combine multiple exposures, apply sophisticated noise reduction, and use artificial intelligence to optimise colour, contrast, and sharpness in real time, producing results that would have been unthinkable even five years ago.
The key limitation of any smartphone remains optical zoom. Even the best phone telephoto lenses top out at an equivalent of around 120-230mm, which is far less reach than dedicated wildlife lenses. This means you will need your subjects closer to produce frame-filling shots — but Laikipia’s private conservancy model, with its off-road access and walking safaris, frequently delivers the proximity you need. Some of the most shared safari images on social media are smartphone shots taken at close range during walking safaris or from vehicles positioned by skilled guides.
To maximise your smartphone safari photography, start by shooting in the phone’s highest quality mode — ProRAW on iPhone or Expert RAW on Samsung — which preserves more detail and allows better post-processing. Use the native camera app rather than third-party apps, as it is optimised for the phone’s computational photography pipeline. Avoid digital zoom beyond 5x, which degrades quality significantly — instead, crop later during editing. Keep your lens clean, as fingerprints and dust are the biggest culprits for soft, hazy smartphone images on safari. Use burst mode (hold the shutter) for action shots — your phone captures many frames per second and you can select the sharpest one afterwards. For video, shoot in 4K at 30 frames per second for the best balance of quality and file size, and hold the phone in landscape orientation for a cinematic look. If your phone supports a telephoto portrait mode, use it for individual animal portraits — the computational background blur can produce remarkably professional-looking results.
Consider investing in a clip-on telephoto adapter or a smartphone digiscoping setup, which couples your phone to a spotting scope for extreme magnification. These are lightweight, affordable, and can produce surprisingly good results for birds and distant wildlife. Several Laikipia properties keep spotting scopes available for guests, and a simple phone adapter turns these into powerful long-range photography tools.
Best Photographic Locations in Laikipia
Different conservancies offer different strengths for Laikipia wildlife photography. Ol Pejeta is the best location for rhino photography, including the chance to photograph the last two northern white rhinos, and the Sweetwaters Chimpanzee Sanctuary provides unique primate subjects. Lewa-Borana offers pristine landscapes with Mount Kenya backdrops and outstanding rhino and elephant photography. Loisaba’s dramatic escarpment scenery and Starbeds location provide some of the most spectacular landscape photography on the plateau. Laikipia Wilderness is renowned for wild dog photography, nocturnal species, and the chance to photograph melanistic leopards. The community conservancies (Il Ngwesi, Lekurruki, Tassia) offer unique cultural photography opportunities and less-photographed landscapes. For a comprehensive overview of each conservancy’s character and wildlife, see our Laikipia conservancies guide.
Planning Your Photography Trip by Season
The timing of your visit has a significant impact on the Laikipia wildlife photography opportunities you will encounter, and each season brings distinct advantages for different styles of photography.
The dry season from June to October and January to March is the classic choice for Laikipia wildlife photography. Vegetation is sparse, making animals easier to spot and photograph without obstruction. Wildlife concentrates around permanent water sources — rivers, dams, and springs — creating natural gathering points where you can photograph multiple species with minimal driving. The light is consistently clear and warm, with dusty atmospherics that add drama to backlit and silhouette images. However, the landscape can appear dry and brown, and the most popular properties are busier with visitors during these peak months.
The green season from April to May and November to December offers a completely different Laikipia wildlife photography palette. The landscape transforms into lush greens, wildflowers carpet the plains, and dramatic storm clouds build throughout the afternoon, creating spectacular skies and lighting conditions. Many species give birth during or just after the rains, so you may encounter newborn calves, foals, and cubs — irresistible subjects for emotive wildlife photography. Migratory birds swell the species count, providing fresh subjects for avian photographers. The green season also brings lower visitor numbers, meaning you will often have sightings entirely to yourself, and accommodation rates are typically lower, stretching your photography safari budget further.
For the ultimate combination, plan an extended trip that straddles the transition between wet and dry seasons — late October or late March. These shoulder periods combine the green landscape with improving visibility as vegetation begins to thin, creating a best-of-both-worlds scenario. Water is still available in seasonal pools and streams, wildlife has not yet concentrated at permanent sources, and the variety of backgrounds and conditions gives you maximum creative range across a single trip.
Photography Safaris and Workshops
Several operators offer dedicated Laikipia wildlife photography safaris, designed specifically for serious photographers. These trips typically feature specially modified vehicles with open sides, roof hatches, or camera mounts, guides with photography expertise who understand the importance of positioning, light, and patience, small group sizes (usually two to four photographers per vehicle), flexible schedules built around golden hour shooting rather than standard game drive times, and evening review and critique sessions with professional photographers.
Laikipia Wilderness Camp in particular has built a reputation as one of East Africa’s premier photography destinations, attracting professional wildlife photographers from around the world with its wild dog sightings, melanistic leopards, and outstanding guiding team. Several international photography workshops and tours include Laikipia as a key location, often in combination with the Masai Mara or Samburu.
Protecting Your Gear
Successful Laikipia wildlife photography means protecting your equipment from the environment — dust, heat, humidity during the green season, and rough roads can be tough on camera gear. Here are the essential precautions. Keep your gear in a sealed, padded camera bag when not in use — a quality bag from Lowepro, Peak Design, or Think Tank protects against dust, impacts, and moisture. Change lenses as infrequently as possible, and always with the camera body facing downward to prevent dust from settling on the sensor. Carry a rocket blower and use it on your lens front element and sensor regularly. Use UV or clear protective filters on your lenses to shield the front element from dust and accidental scratches. Store silica gel packets in your camera bag to absorb moisture, particularly during the green season. At the end of each day, wipe down your camera body and lenses with a microfibre cloth to remove dust before it works its way into crevices and mechanisms.
Ethical Wildlife Photography
Responsible Laikipia wildlife photography is not just a moral imperative — it is essential to preserving the extraordinary access that makes Laikipia’s conservancies so special for photographers. The private conservancy model works because wildlife remains habituated to vehicles and comfortable around humans who behave predictably and respectfully. Photographers who push boundaries — demanding their driver chase animals, requesting dangerously close approaches, or using flash inappropriately — risk habituating wildlife to stress or aggression, which ultimately degrades the experience for everyone and can lead to stricter access restrictions.
The first principle is always to prioritise the animal’s wellbeing over the photograph. If an animal shows signs of distress — flattened ears, alarm calls, rapid movement away from you, or aggressive posturing — your vehicle is too close or has been in position too long. Ask your guide to increase distance or move on entirely. The best wildlife photographs come from patient observation of relaxed animals behaving naturally, not from pressuring stressed animals into dramatic responses. A lioness yawning contentedly makes a more authentic and powerful image than one snarling because your vehicle pushed too close.
Be particularly sensitive around nesting birds, denning predators, and animals with young. These are vulnerable moments where disturbance can have serious consequences — abandoned nests, relocated dens, or separated mothers and calves. Your guide will know the appropriate distances to maintain, and a good telephoto lens means you do not need proximity to capture compelling images. When photographing on walking safaris for Laikipia wildlife photography, follow your guide’s lead absolutely — they understand animal behaviour and will position you safely and responsibly.
The question of geotagging deserves special attention. Social media posts with location data attached have been directly linked to increased poaching pressure on rhinos and other endangered species. When you share images of rhinos, pangolins, wild dogs, or other vulnerable wildlife, strip all location metadata from your files and avoid naming specific locations in your captions. Most photo editing software and social media platforms offer options to remove or disable geolocation data. This small step can make a meaningful contribution to conservation — a responsibility that every wildlife photographer should take seriously.
Finally, support conservation through your photography. Many Laikipia conservancies fund their operations through tourism revenue, and your visit directly supports anti-poaching patrols, community livelihoods, and habitat protection. Consider donating outstanding images to conservancies for their marketing and fundraising efforts, purchasing prints from local photographers, or supporting organisations like the Northern Rangelands Trust and Kenya Wildlife Conservancies Association that sustain the landscape you have come to photograph.
Post-Processing and Sharing Your Images
Your Laikipia wildlife photography images deserve careful post-processing to reach their full potential. Shoot in RAW format to give yourself maximum flexibility when adjusting exposure, white balance, and colour in software like Adobe Lightroom or Capture One. Basic adjustments that will improve almost every safari image include lifting the shadows to recover detail in dark fur, reducing highlights to retain sky detail, adding a touch of clarity or texture to enhance fur and feather detail, adjusting white balance for warmth (safari images generally benefit from a slightly warm tone), and careful cropping to improve composition — sometimes the strongest image is hiding inside a wider frame.
For sharing, resize your images for the platform — full-resolution files are unnecessary for social media and slow to upload. A long edge of 2048 pixels is sufficient for Instagram and Facebook, while 4096 pixels works well for portfolio websites. Always add a subtle watermark if you plan to share images publicly, and as a responsible practitioner of Laikipia wildlife photography, consider the ethical implications of geotagging rare or sensitive species like rhinos — removing location data from your metadata protects animals from poachers who monitor social media for location information.
Laikipia wildlife photography will reward your ambition in ways you cannot predict. The light, the wildlife, the landscapes, and the freedom to position yourself creatively combine to produce images that will stand among the best in your collection. All you need to do is arrive prepared, stay patient, and let this extraordinary place work its magic through your lens. For help planning the perfect photography-focused safari, explore our safari guide, check our accommodation recommendations for properties with strong photography programmes, and use our travel planning guide to organise the logistics. Start with our complete Laikipia Kenya guide for an overview of everything this remarkable destination has to offer.
Leave a Reply